-
×
 The passion of the christ
1 × $9.90
 -
×
 Spiderman
1 × $12.50
 -
×
 Integra DPS-5.5 CD / VCD / DVD Player
1 × $199.00
Subtotal: $221.40
 The passion of the christ
1 × $9.90
 Spiderman
1 × $12.50
 Integra DPS-5.5 CD / VCD / DVD Player
1 × $199.00
Integra DPS-5.5 CD / VCD / DVD Player
1 × $199.00Subtotal: $221.40
 The passion of the christ
1 × $9.90
 Spiderman
1 × $12.50
 Integra DPS-5.5 CD / VCD / DVD Player
1 × $199.00
Integra DPS-5.5 CD / VCD / DVD Player
1 × $199.00Subtotal: $221.40
Ocassionally we have customers asking how they can transfer their old analog treasures (most of the time cassette tapes) into the digital realm. In tis blog post we want to resolved some myths around this and provide some useful instruction how to do this. We will also look into some (free) software to run on your computer for the actual digitalisation task.
Lets start with a quick break down what you need and dive into each item a bit deeper:
The Cassette Deck
The cassette deck will be at the heart of the whole process. If its not playing back the tapes well, the result won’t be good. So picking a serviced cassette deck is the way to go. Serviced alone is not a guarantor for good sound. So the deck you purchase for this purpose need to be selected carefully. If you buy a low end serviced deck at a low price you will get the audio off your tapes. But it might not be great. At the same time its not necessary to spend literally thousands of dollars for a cassette deck. Check what you are buying, was this a low end, mid range or even top of the range deck of that time? If its not low end you should be good to go. What doesn’t matter is if the deck has “3 heads” or any features that (e.g. bias adjustments) are important to produce great recordings. Keep in mind that you are just playing back tapes and these do not affect playback quality.
The two head Nakamichi cassette decks are a good pick where you can hardly go wrong (e.g. Nakamichi 480,580,680, BX125, BX150, RX202). Higher models will work of course too, but will be more expensive. One advangtage of these decksis that they do not require the felt pad on your cassette tapes (the spongy thing in the middle of you cassettes) to be intact. They have a mechanism to push it actually away and solved the problem to maintain a good head contact in a different way.
There is one more important thing that has to be considered for the purchase of the right cassette deck. Were these tapes you want to archive recorded with noise reduction? That would be either Dolby B or the better Dolby C that became available in the 80ties. If a tape has been recored with Dolby, it has to be played back with the same Dolby type. If you play back a tape that has been recorded with Dolby C without Dolby C turned on, you will end up with completely warped highs. Samme applies to Dolby B, but B is more forgiving and the tapes would just sond a bit brighter than they should. There is no good way to determine if they were, or were not recorded with Dolby. My personal recordings are all with Dolby C and my tapes would have a marking ‘C’ on them to make that clear for anyone who wants to play them back. The time when the tapes have been recorded (before 1980 or after) and what kind of deck the owner had might be a good indicator here. If you need Dolby C, make sure that the cassette deck you choose has this option. Pretty much any deck afer 1980 has it.
The computer
There is no hard work to be done for the computer, therefore an older system is more than sufficient. It doesn’t matter wheather you use a PC and Windows or a Mac on OSX. The software we use is available for both. But no matter what you use – you will need an audio input. Most laptops and all Macbooks do not have an audio input anymore. Most desktop PCs do and also most desktop Macs as far as I am aware.
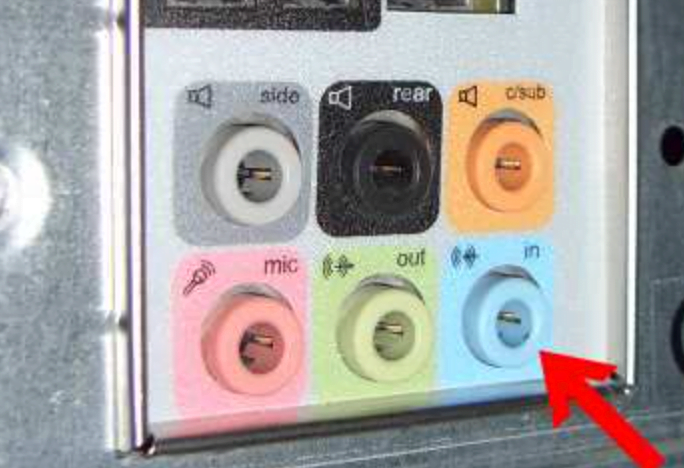
If you don’t have one, especially if you are on a Macbook or Laptop thats not a problem. We will cover that in the next section.
The USB Audio Device
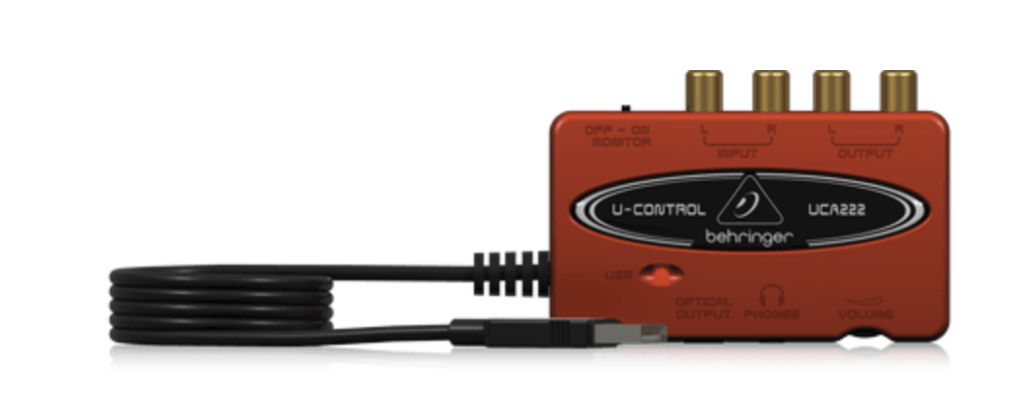
There is nothing really special needed here. Pretty much any USB Audio gadget providing a line input will work. Btw, a microphone input and line input are not the same. You see in the picture above that also on the backpanel of the PC seperate inputs for each are provided. So lets not confuse line input with microphone input. There are plenty of options online available to purchase. If you just search on Google for “USB Audio” you will find plenty starting from $5. If you are keen to also get an audio quality upgrade from what your PC or Mac desktop provide I can recommend the Behringer UCA222. It sells below $50 and is a professional capture device for analog audio.
The Audio Capture Software
For capturing (or recording) the audio on our computer we use the free software Audacity. Audacity can be downloaded here.
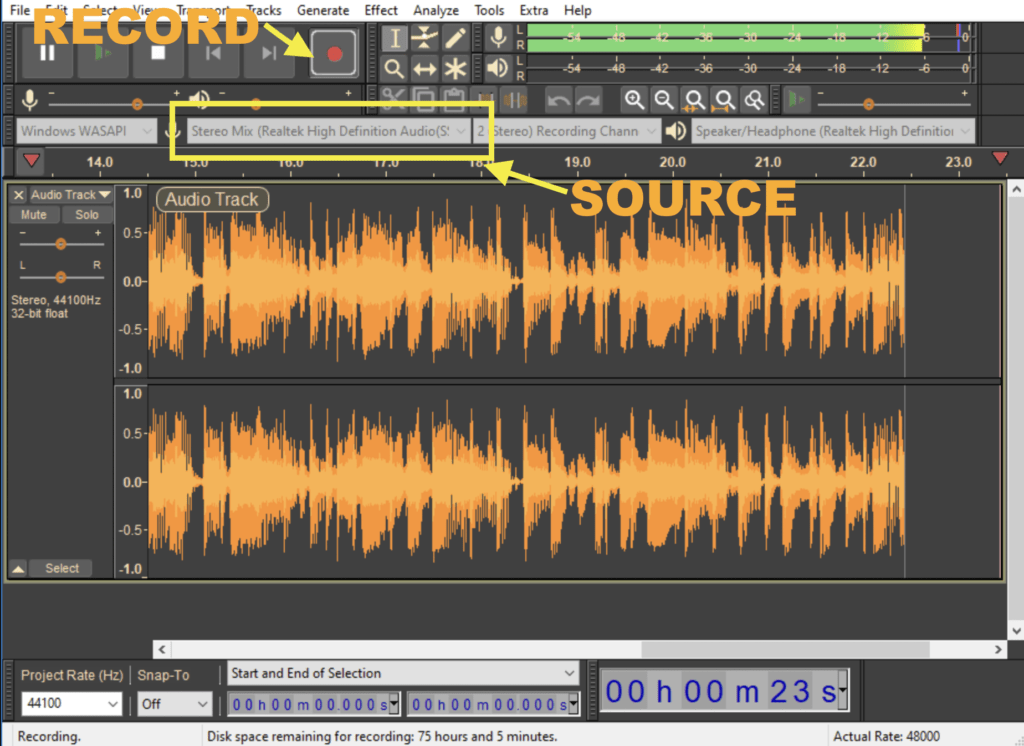
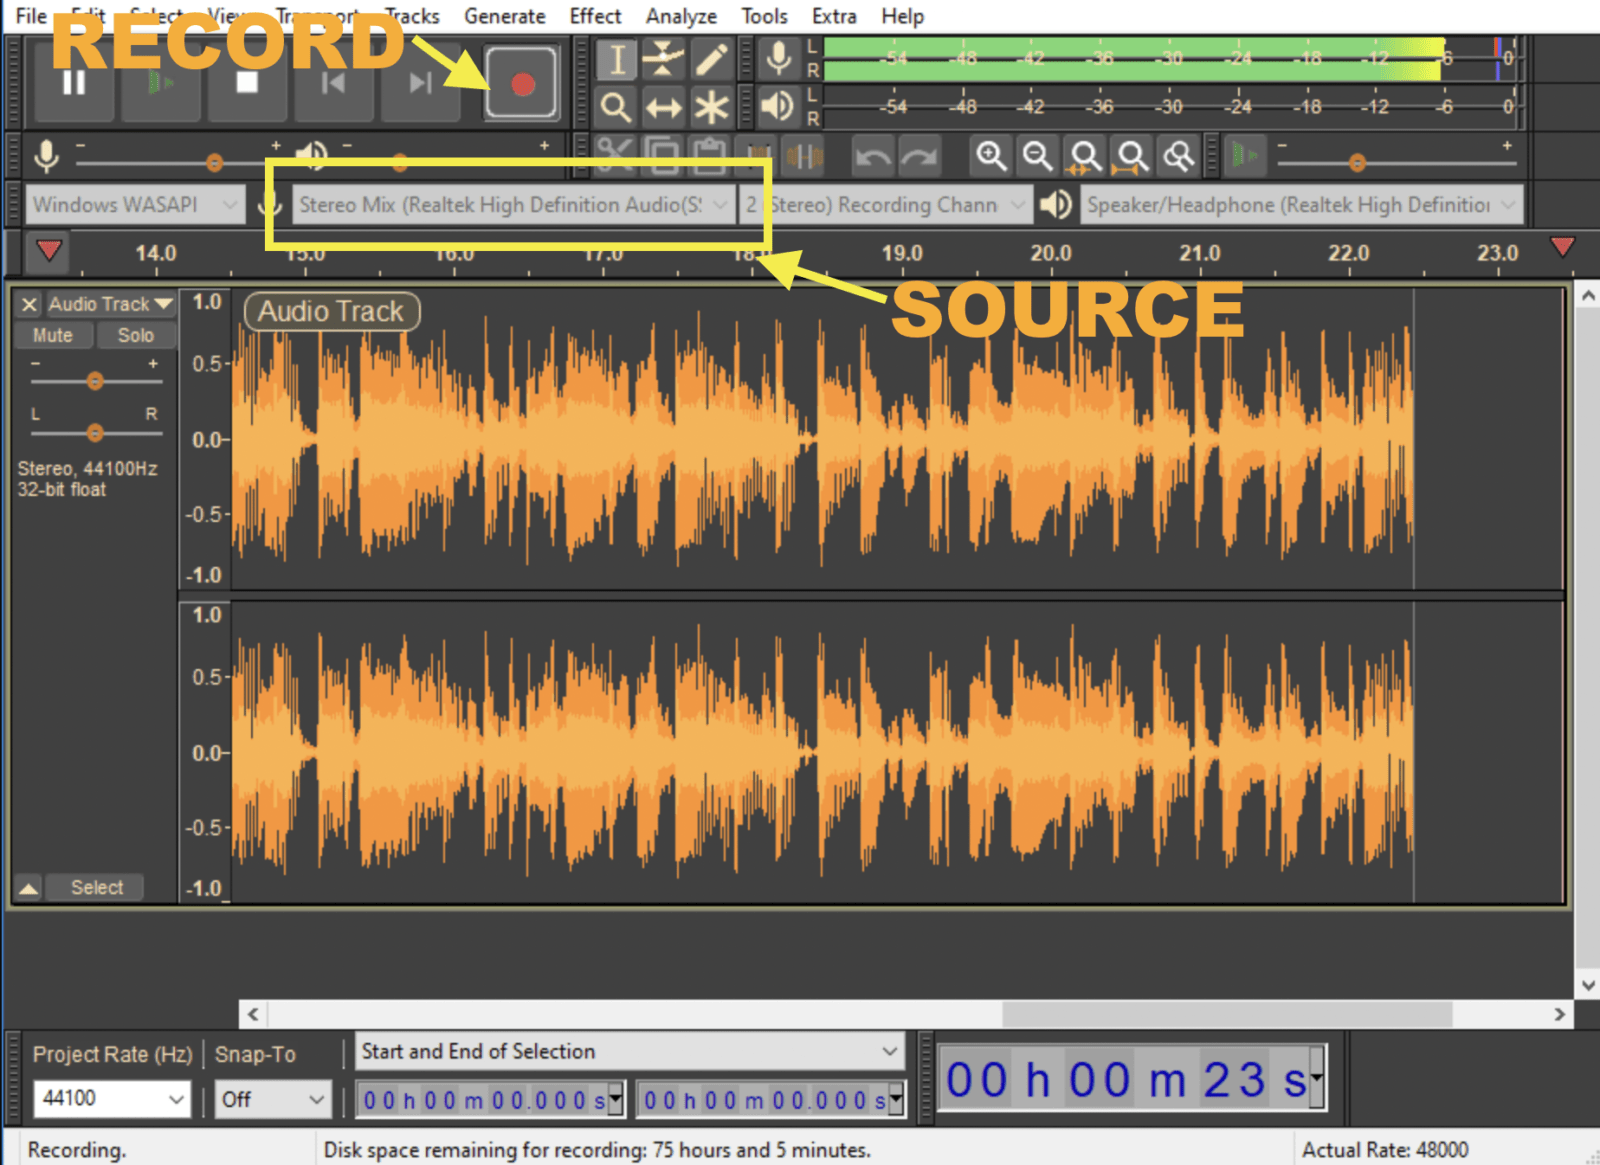
Thats how Audacity looks like. Explaining in all detail how it works would be beyond the scope of this blog post. But the important part is to select the correct source (e.g. Line In or USB Audio for Behringer) and hit the red “record” button. Sensitivity of the recording can be adjusted in Audacity. So if the input is too loud or not loud enough is not an issue – just a matter of moving the input level adjustment in Audacity.
Once a recording has been done it can be exported in WAV, FLAC, MP3 or other formats. The question would be how you want to go about it. Play an entire site of a tape and capture it at one or title by title? If you want each title recorded seperately you can just select that part of your recording in Audacity. There are also filters and effects available to improve what you have captured – but that would take it to the next level and usuallt not necessary to be used for a simple transfer.
Wiring?
You might have heard that you will need an amplifier for this or some special gear like a mixer. But thats not true. To get the best results just connect the components directly.
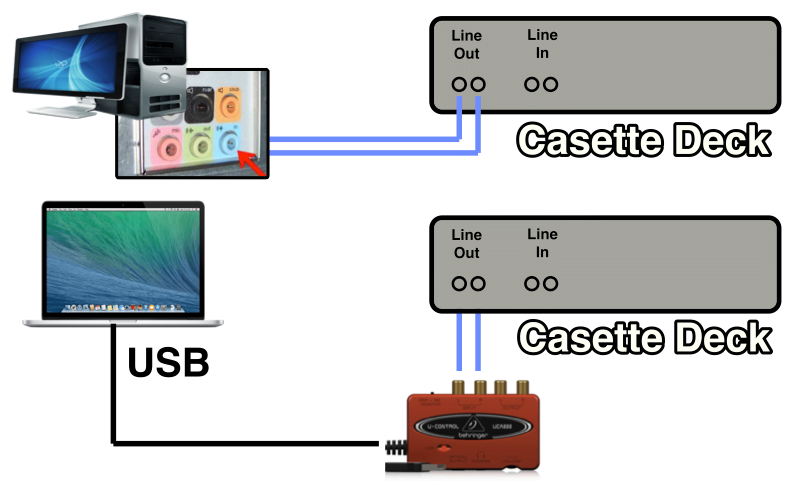
To connect the cassette to the computer you would need a 3.5mm to RCA cable that you can find here in our shop. For the connection to the Behring you require just a normal RCA cable. Thats really all thats needed.
Feel free to talk to us if you still have questions for you tape archiving project. If that is too much hassle and you rather want to offload this to us that’s also possible – we provide this as a service.
Leave a Reply